How Far Back Should I Mount My Scope: DIY Mounting in 7 Easy Steps
How far back should I mount my scope? This question confuses hunters/shooters while they adjust the scope of their guns. Every shooter has a different shooting style and the distance, eye relief, and adjustments may vary according to preferences.
Following the instructions and steps to mount the scope can help you avoid any mishap while ensuring the most comfortable and safe shooting experience. Read on to learn about the sight-in method, the importance of eye relief, and how to correctly mount your scope. Let’s begin!
How Far Back Should I Mount My Scope – Expert Insight
Finding the perfect alignment for your riflescope is always discovered through countless “trials and errors”. Depending on your stance and shooting position, all shooters may have slightly different requirements for eye relief and distance away from the eye.
The following factors determine how far back you should mount the riflescope:
- Type of rifle and scope being used.
- Eye relief distance is recommended by the manufacturer.
- Shooting position of the shooter and the rifle.
- Height of the shooter and the rifle.
- Weight of the shooter and the rifle.
- Level of recoil generated when firing.
- Distance of the target from the shooter.
- Type of terrain being used for shooting.
- Ambient temperature and weather conditions.
- The intended purpose of the rifle and scope.
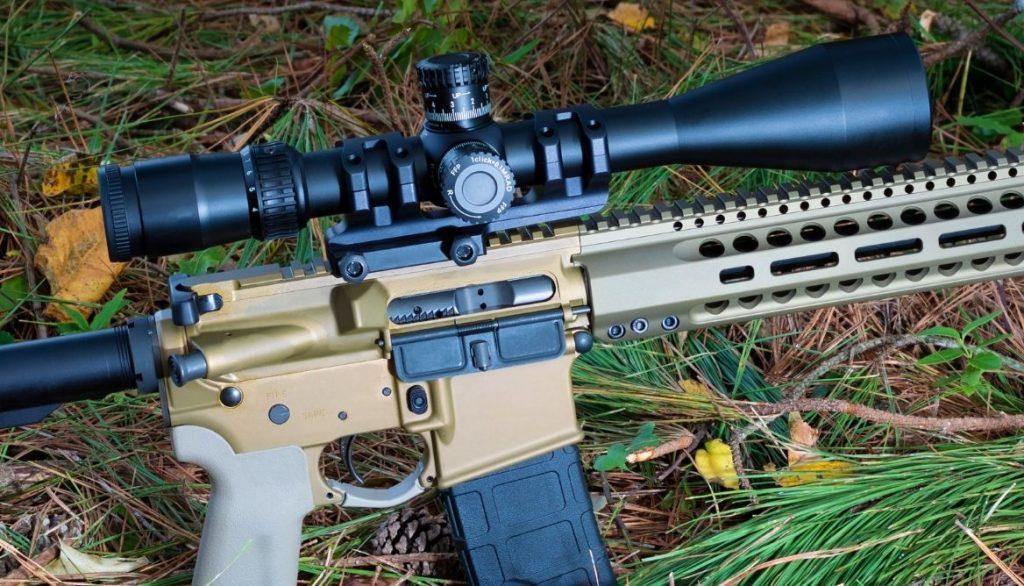
Mounting a Rifle Scope: Is Yours Too Far Back?
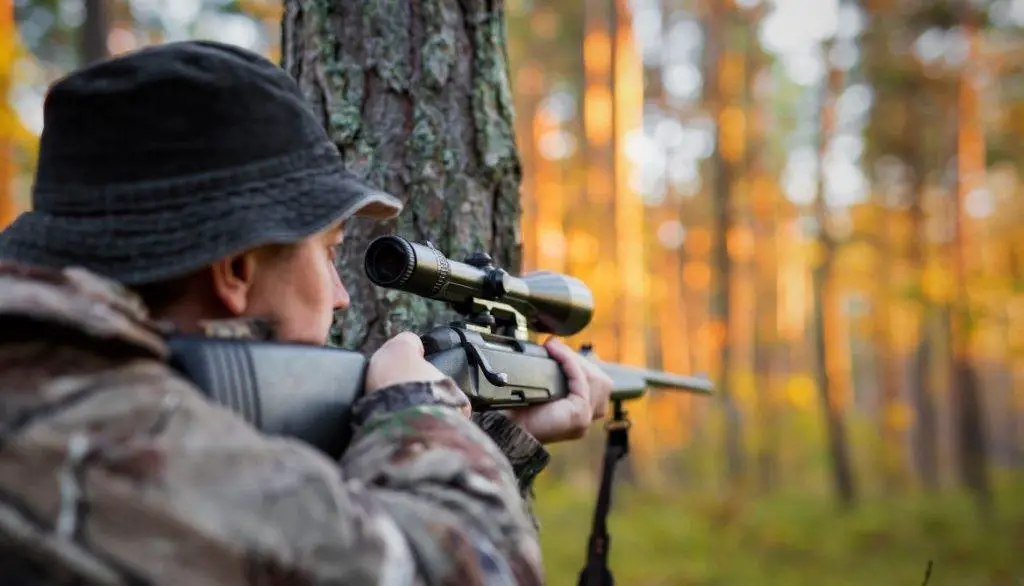
The most common sign to notice if your scope is too far back is when you pull your head back to have a full field view and try to save your eyes from being hit by the ocular rings of the riflescope. This means that your scope is not properly mounted!
It is a different scenario during a competition as you lean into the scope. But, aiming at higher elevations such as uphill might require you to get closer to the ocular rings resulting in injury from recoil. What is the reason? The scope is mounted too far back and there is no eye relief present!
How to Ensure it is Not Too Far Back?
A rifle scope that is too far back can cause inaccuracy when shooting. Here is how to avoid such mishaps:
- Generally, the scope position should be 3-4 inches from your eye.
- It is important to read the instructions for your specific rifle and scope to determine the proper eye relief distance.
- You should double-check the scope for proper alignment and secureness before shooting.
- Periodically check the scope ring for tightness after shooting.
Mount a Rifle Scope Yourself in 7 Easy Steps
Mounting the scope can be a difficult process if a certain set of steps are not followed. Here is a quick and easy guide to make the process hassle-free!
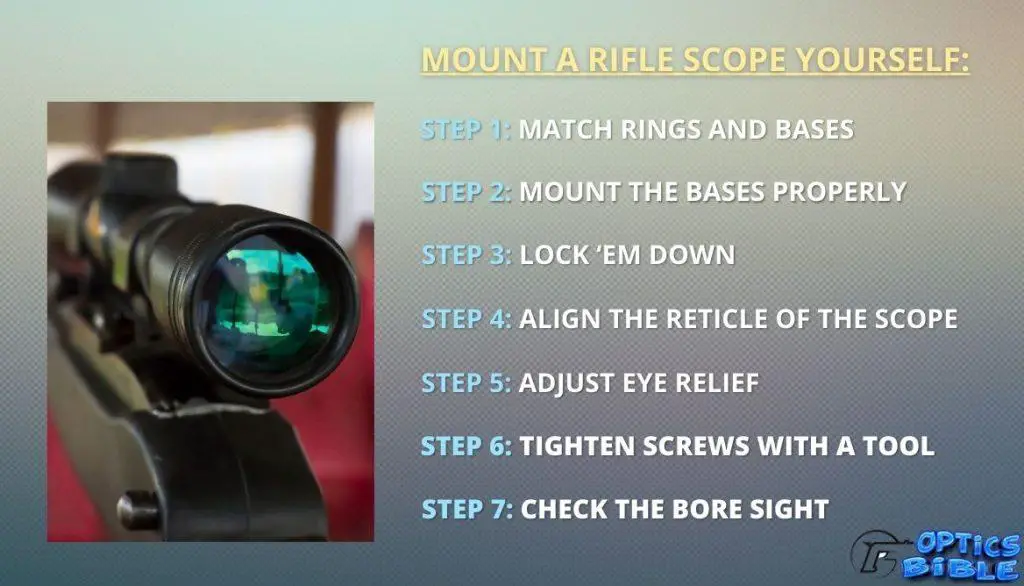
Step 1: Match Rings and Bases
Check the mounting system and ensure that it is the proper fit for your mounting attachments. You need to check the diameter and height of the rings for the best positioning of the scope.
There are specific scopes that may only fit a certain type of scope base. So, make sure that the components match.
Step 2: Mount the Bases Properly
Wipe the base surface with a clean cloth. apply a thin coat of rust preventive product or oil. Now align the bases properly. Make sure they are not positioned in the wrong direction.
Step 3: Lock ‘Em Down
To secure the screws and fitting, a small drop of the best screw threads-freezing compound (e.g. Loctite) might work effectively. Always tighten the screws alternatively to get a tight and secure result.
Caution! Gun owners prefer rings that attach to the front with the use of a rotating socket system. Never use the scope as a lever to pivot anything. Making use of a wooden dowel or a similar item would be the best choice.
Step 4: Align the Reticle of the Scope
Now the bottom half of the rings have been set in place. Fit the scope on them, place the top halves, and tighten the rings. Now you need to rotate the scope to adjust the reticle vertically and horizontally in perfect alignment.
Note: Only allow sufficient space for the scope forward and backward movement.
Step 5: Adjust Eye Relief for the Best Shooting Position
You need to position the scope far enough from your eye to be safe from the recoil.
Expert advice: Always set the scope about 1 inch further than your set adjustment.
Step 6: Tighten Screws with a Tool
After everything is set, you now have to re-check the position of the scope to confirm it and then tighten the ring screws to finally fit it in place.
Step 7: Check the Bore Sight
The bore sight helps you to just the vertical and horizontal axis of your preferred point of aim. Make sure to use the suitable insertion pin according to the caliber you are using.
Expert advice: Precise sight-in of your hunting rifle can only be done through fire tests on a shooting range and then recording the results. Later, you can move the scope as per need.
Why Your Rifle Keeps Missing
There are several reasons why your rifle keeps missing. One of the biggest reasons is adjustments in the scope. While other reasons might be as follows:
- Poor shooting technique – improper sight alignment, breathing/trigger control, or body postures.
- Unstable platform – an unreliable shooting rest or support that can cause the rifle to move off target.
- Poor quality ammunition – incorrect grain weight, low velocity, or inconsistent burn.
- Poorly zeroed scope – the scope and rifle may not be aligned properly.
- Environmental conditions – strong wind, rain, dust, and other outdoor elements could affect accuracy.
One-Shot Sight-In Method
The One-Shot Sight-In Method is a technique for quickly and accurately zeroing your rifle’s scope. It involves firing just one shot to establish your initial sight-in, then making small adjustments to fine-tune the alignment.
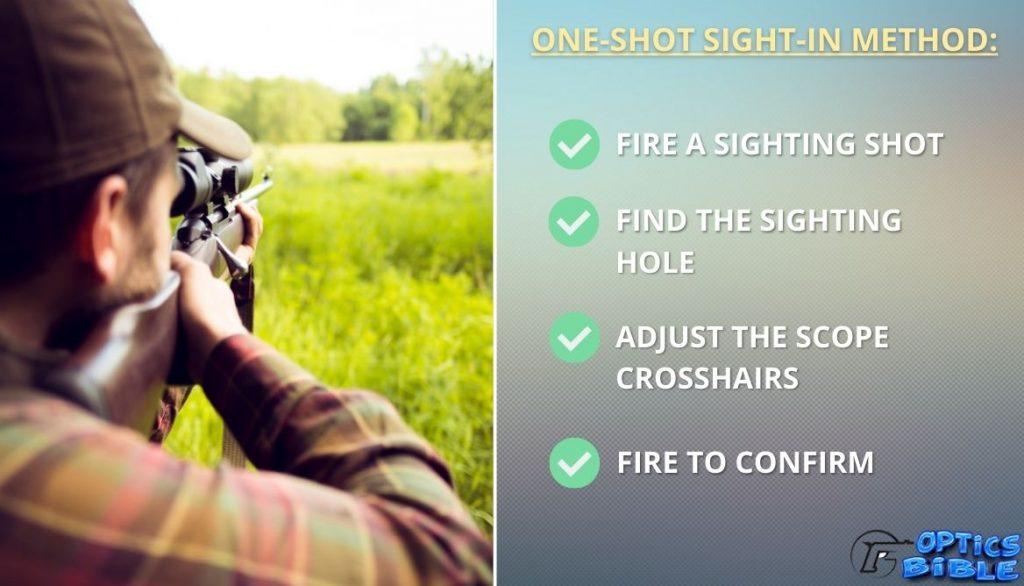
This method can save time and frustration when compared to traditional methods, which require firing several rounds at the target.
1. Fire a Sighting Shot
Here’s everything that you need to do for firing a sighting shot:
- Make sure your rifle is unloaded and solidly positioned on the rest.
- Check aim by dry-firing a couple of times.
- Increase scope magnification to the highest setting.
- Use a target at least 18 inches square.
- Wear eye and ear protection.
- Aim carefully and fire off a single shot.
2. Find the Sighting Hole
Increase the scope to 6X or more and use decent lighting to spot the bullet hole at 100 yards. If not visible, mark the hole with a black circle visible from the shooting position. A partner can help with this step.
3. Adjust the Scope Crosshairs
Aim at the same point as the target used for the sighting shot. Have a partner turn scope adjustments until the crosshairs intersect the bullet hole. Also, make tweaks to vertical and horizontal wires independently to position the crosshairs below the bullet hole, setting it according to the desired aim height.
4. Fire to Confirm
Fire a second shot to validate your zero and the process is complete. If you shoot from a secure rifle rest, it’s possible to sight in by yourself, holding the rifle with one hand and adjusting the scope with the other.
Eye Relief – The Critical Distance
Understanding eye relief is the key factor in adjusting the right distance for eye relief. Eye relief can be defined as the distance between the lens of your eye and the riflescope. You may find eye-relief details in the technical data provided on the box or manuals.
Why is Eye Relief So Critical?
To view the best quality image, a shooter has to position the eye at a certain distance from the rear lens of the scope. If the optimal distance is not maintained while the shooter shoulders the gun, the shooter might experience the following scenarios:
- A dark outline or halo on the outer edge of the image.
- While aiming distortions of the target might occur.
- You may notice improper or off-center reticle images.
How Much is Enough for Correct Eye Relief?
You may notice that for all shooters the eye relief is not the same as per their shooting style. Minor adjustments need to be made and with frequent use, a shooter may master this practice. Usually, three to four inches is the best distance for eye relief.
1. Short or Normal Eye Relief Lengths
For shooters who usually have short-range encounters during hunting or even practicing, a 3.5 to 4-inch eye relief is the ideal length.
2. Long Eye Relief Scopes
An eye relief positioning greater than 4.5 inches and a long eye relief scope are preferred for higher caliber rifles (such as a .50 caliber bolt action rifle requires longer eye relief scopes).
The recoil from high-powered rifles has a huge backward movement of the scope and this needs sufficient eye relief to counter the movement.
Mounting Your Scope – Getting it Right
Several precautions and mistakes occur when you mount your scope. Read below to help you avoid these mishaps:
Recommended Precautions for Mounting the Scope
The following are the must-take precautions for scope mounting:
- Make sure the scope rings are properly aligned and securely attached to the gun’s receiver.
- Use a screwdriver or Allen wrenches to tighten the mounting screws securely.
- Use a torque wrench to ensure that you do not over-tighten any screws.
- Place the scope into the rings and check that it fits snugly.
- Use lapping paste to smooth out any internal imperfections in the scope rings.
- Make sure all lapping paste is removed before final assembly.
- Use a level to check the scope for proper alignment.
- Double-check the scope ring(s) for tightness after shooting.
Common Mistakes During the Mounting Process
Here are some common mistakes that you need to avoid during mounting:
- Not double-checking the alignment of the rings.
- Not checking that the screws are securely tightened.
- Not applying enough torque when tightening the screws.
- Overly tightening the screws, which can damage the scope.
- Not using lapping paste to even out any internal imperfections in the scope rings.
- Not properly checking the scope for proper alignment and secureness before shooting.
- Exposing the scope to moisture or dust, can cause the lenses to fog up or become damaged.
What’s the Deal with Unlimited Eye Relief?

The traditional riflescopes are a set of lenses that perform a certain level of magnification while shooting. But, modern-day riflescopes are very different as they have eye relief features. Most riflescopes can be categorized in the following ways:
- Digital Riflescopes
- Holographic Optics
- Red Dot Scopes
- Reflex Red Dot Scopes
Digital rifle scopes may generate a sight picture on the screen for the shooter instead of creating an image through the set of lenses. While red dots and reflex red dot sights may not have magnification features.
Finally, holographic sights may provide some level of magnification and they generate a sight picture by creating a reticle image while you look through the sights.
How To Mount A Scope On AR Rifles
Mounting a scope on the rifle needs careful adjustments and measurements. You need a set of tools and patience to perfectly mount the scope for accuracy when aiming down the sights.
Tools You Need to Mount a Scope
A specific set of tools are needed to mount the riflescope with impeccable results. Here is what you would need during the mounting procedure!
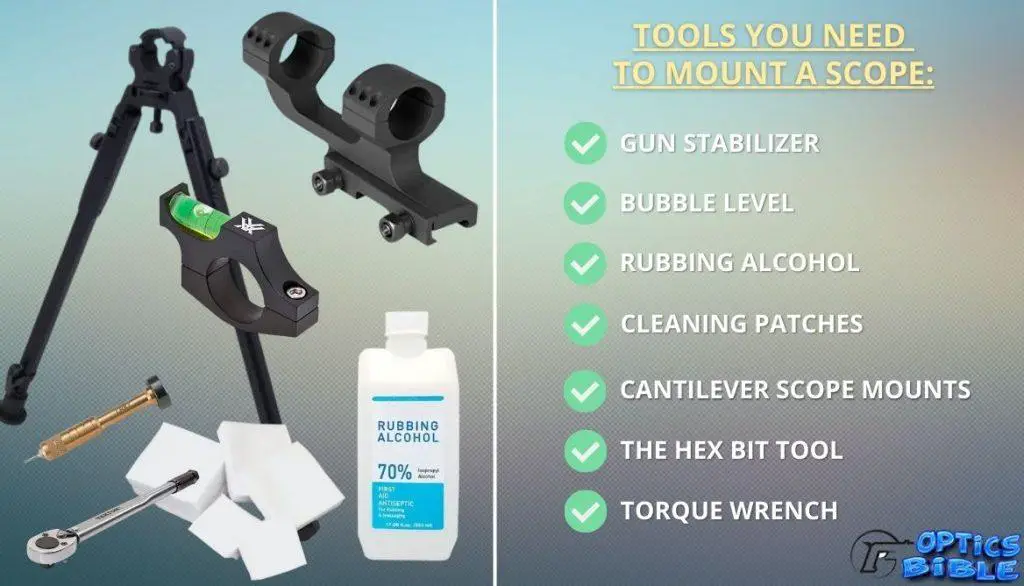
1. Gun Stabilizer
Most gunsmiths or gunshops may have a gun vice but not all gun owners have such specialized equipment. But, you can improvise by making a DIY gun mount. Using bipods and grounding the pod legs with sandbags will do an excellent job. This way you can make your very own DIY gun vice.
2. Bubble Level
A bubble level is an important tool that helps to level optics when mounting the scope. You would want the gun perfectly aligned horizontally to mount the scope with perfection.
3. Rubbing Alcohol and Cleaning Patches
Before mounting the scope, you would want to clean the surfaces to ensure that there are no unwanted particles on the surfaces.
4. Cantilever Scope Mounts
The mount comes equipped with a forward reach double ring with the addition of two sets of rings that can easily fit Picatinny Weaver Rails.
5. The Hex Bit Tool
This tool is a must if you frequently mount scopes on your rifles. If you do not have this tool then be sure to purchase one beforehand. The tool consists of standard bits and wrenches that will help unmount and mount any scope on the gun.
6. Torque Wrench
This tool helps to fit the scope mount to the AR15 platform. It is also a multipurpose tool that will be commonly useful for other household tasks too.
Some Key Recommendations for Scope Mount Procedure
Like all other rifles, AR15s also follow the same steps for mounting (read above for a more detailed guide). Each step for mounting the riflescope is very crucial. Wiping the parts, measuring the distance, leveling the weapon, making careful adjustments, and rechecking small details are some ways to perfectly execute the mounting process.
When mounting a scope onto an AR15, it is important to consider a few key recommendations. Following these recommendations will help ensure you get the most out of your rifle and maximize accuracy when shooting. Read below for a better scope mount method!
- Make sure the scope is the proper height for comfortable and consistent eye relief.
- Check the torque of all screws to ensure the scope won’t move while firing.
- Always use the appropriate scope rings, bases, or mount bases.
- Make sure to properly align the scope with the bore of the rifle before tightening any screws.
What is Lapping the Scope Rings?
Lapping the scope ring is a process of filing and polishing the internal surfaces to ensure that there are no imperfections that could interfere with the proper mounting of the scope. This process helps to create a smooth, even surface to mount the scope.
FAQ
How far should my eye be from the rifle scope?
The recommended distance from your eye to the rifle scope is typically 3.5 inches or 8.89 centimeters.
Is there supposed to be a gap in scope rings?
Yes! The gap should be between 0.006 inches to 0.010 inches depending on the type of mount and rings you are using.
How far back should a scope sit?
The back of the scope should sit at a distance of 3-4 inches from your eye, although this can vary depending on the type of rifle you are using.
How much ring gap is too much?
Generally, a gap of more than 0.010 inches is too much. Any gap larger than this can lead to the improper mounting of the scope, resulting in inaccurate aim and shooting.
How far can a 12×50 scope See?
A 12×50 scope can typically see up to 1000 yards away, depending on the type and quality of the scope.
How high should your scope be mounted?
Most scopes are mounted about 2 to 3 inches above the centerline of the barrel.
Conclusion
Properly mounting a rifle scope is essential in ensuring accuracy and consistency when shooting. When it comes to determining how far back you should mount your rifle scope, there is not one size that fits perfectly as everyone’s preferences and comfort levels may vary.
The recommended distance is at least 2-3 inches from the rear of the receiver to the front of your scope. This will provide a clear sight picture and allow for proper eye relief. It is important to make sure your scope is adequately secured and properly aligned with your rifle.
Does your scope feel inaccurate right now? Have you tried adjusting your scope? Check the PRO tips from our guide now! And let us know which method worked best for you!
Tyler Purols
Tyler Purol is a professional Bowhunter. He has professional training in hunting. For many years he hunts regularly.